If you don’t have lots of time but you want to make something special in an easy way without ‘difficult’ tools… this tutorial is perfect for you! In this tutorial I’ll learn you to make an art print with only a few materials. The result is really cool!
Materials:
– paper
The paper doesn’t have to be very thick. Just medium weight paper is perfectly fine. (I used 245 grams paper) Simple print paper will work as well but the ink can come through so a little bit thicker paper looks nicer!
– scissors
A small scissors with a sharp point works the best but any other scissors will work of course but cutting small corner can be harder with a bigger scissors.
– Inkpad
Any inkpad will work (I used a blue versacraft inkpad) You can use any color or brand you like.
– Eraser or a piece of rubber
I used a little rubber leftover but a eraser works out fine as well
– (blade)knife
– sponge
I cut a little piece of a big sponge. That’s easier the handle 🙂
If you have all materials by hand…let’s start the fun!
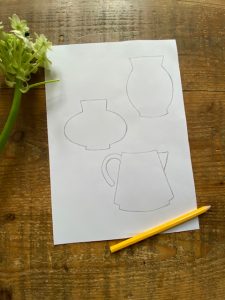
Sketch a pot or vase. It doesn’t have to be a fancy or difficult model. A simple shape is the prettiest I think, so don’t make it to complicated. If you really don’t want to sketch search on internet for a nice shaped vase and print it out. Transfer the image to a piece of paper.
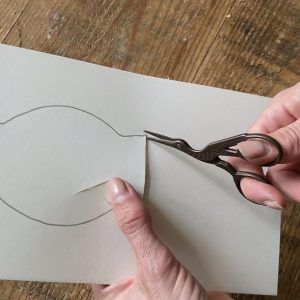
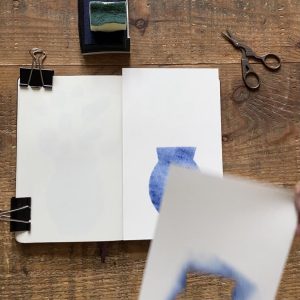
Cut out the vase shape with a small pointy scissors or you can use a sharp knife as well. Important: Keep some paper space around the cut out!!
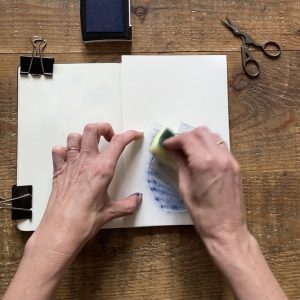
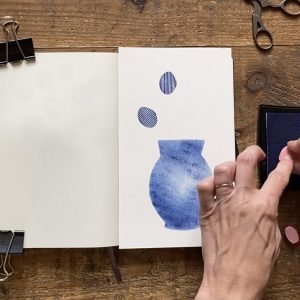
Place the cut out vase on the paper you want to use for your print. Place it at the bottom of your paper. Keep the cut out in place by a little tap on the back of the paper or press it down with your hand.
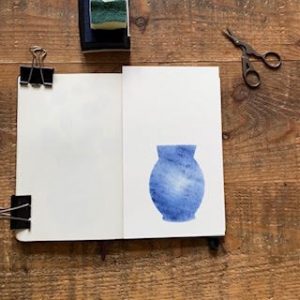
Ink your sponge by tapping it on the inkpad. Then tap the sponge over the print out vase while holding the paper on one place . It doesn’t have to be filled up completely, darker and lighter ink will give the vase more movement!
Now remove gently the top paper…and you vase is done!!
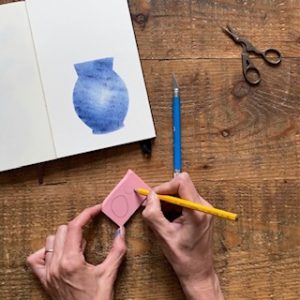
Take a (rubber) eraser and draw some circles or ovals on it with a pencil. Cut out the shapes with a (blade) knife. If you like you can make some structure in the leaves (like stripes or veins) with a knife or a sharp pencil. This isn’t necessary but it gives the leaves something extra.
Ink the ovals and circles by pressing them on the inkpad and stamp a nice and random pattern above the vase. Press harder for darker leaves and softer for lighter colors. You will see that smaller shapes automatically gives a darker print. Remember: you can’t make mistakes here. Nature can grow in any direction so just enjoy and don’t overthink!
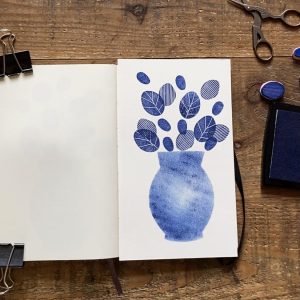
Now it’s time to connect the leaves to each other and the vase. So draw with a fine liner in any color you like stems from the leaves to the vase.
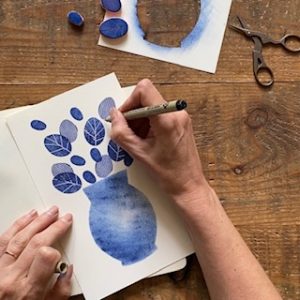
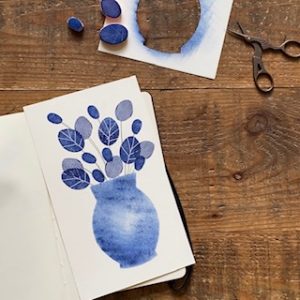
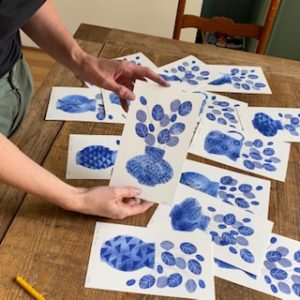
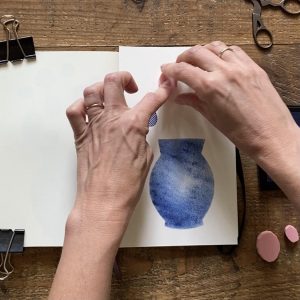
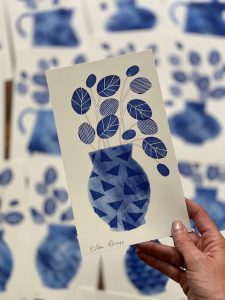
You did it!! Your print is ready! If you like you can give the vase an extra touch by decoration it. Use pencils, paint, glitter, stamps, or anything you like! I cut a corner here (see picture) from the (rubber) eraser and made a pattern on the vase. It’s easy to use the cut out from the beginning and place it over the print. So you can go wild with your decoration on the vase without touching the rest of the print. On the other picture can you find more decoration ideas… I used some stamps from my desk these prints, but also the back of a pencil to make dots etc.
I hope you enjoyed the tutorial. I love to see what you made!!
More tutorial can you find in my blog, also everything about my materials and fabric printing. Thank you!!