Easy stamp making tutorial
Stamp making is so much fun. You don’t need fancy or expensive materials to make something special!
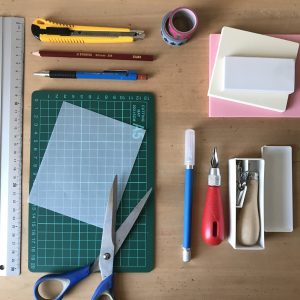
Toolkit:
-(soft) pencil
-carving block, lino or a big eraser
-carving tools/ knife (Speedball and Esdee have sharp but cheap carving sets for sale)
-inkpad (versacraft and stazon or any brand you like)
-tracing paper (baking paper works as well)
 Toolkit
A scissors, ruler and tape are not essential but handy to keep near at hand.
Note: Carving tools are sharp, so please be careful using them. Always carve away from yourself. Make sure your hands are not in the way of the tool.
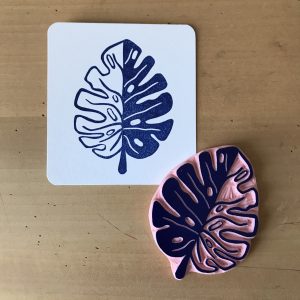
Positive or negative:
You can carve you stamp in two ways, positive or negative. As you can see on the picture, the same design leaf looks totally different in positive or negative. It’s important to think about this before carving.
Positive design: Everything is taken out the carving block. Only the outlines of the design will stay. I love these stamps because of their simplicity.
Negative design: Everything in the carving block stays, only a few details will be carved away. A negative stamp holds the most color.
Depending on your design you can choose for a positive or a negative stamp.
 Negative/positive
Carving a circle:
Place your carving tool on the line to be followed and turn your rubber block slowly. Keep the tool in place and your circle will be perfect.
Small round details:
Small round details like eyes or dots can be make with the tip of a mechanical pen or wooden skewer. Just press it in the block and lift!
Carving lines:
Perfect lines means the right pressure. The harder you press, the deeper the tool will go into the block. So more will be carved away.
The less pressure, the finer a carving line will be. Before starting your stamp design it’s a good idea to practice lines and circles in a eraser. Just get the feeling a bit.
Make a stamp!
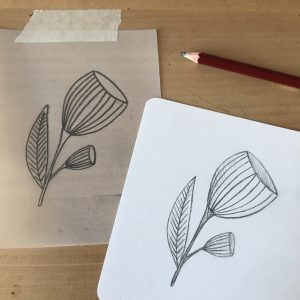
Start with choosing a design. Make something original by drawing a design yourself…you can search for a inspiration in books or internet.
Keep your first design simple!
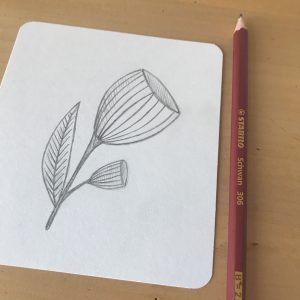 Simple sketch
Place your design on the carving block, just to be sure the design fits and isn’t too big.
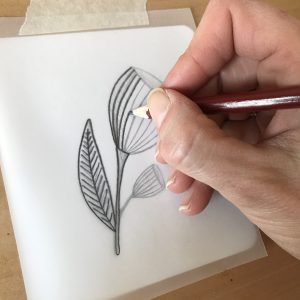
Tracing:
Place a sheet of tracing paper over your design.
Use tape to hold your tracing paper in place. Trace the design with a soft (2B) grey pencil.
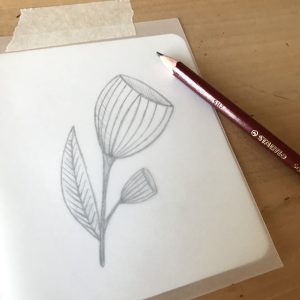 Placing the tracing paper
Place the tracing paper, pencil down, on the carving block. Rub gently with your finger, a coin or folding bone on the tracing paper.
Be careful, don’t move the paper otherwise the design will be blurry on the block.
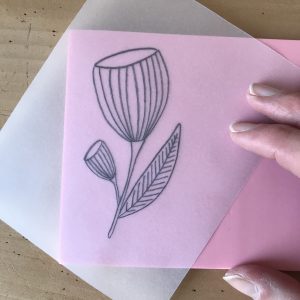 Gently rub on the block
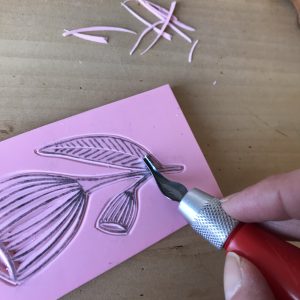
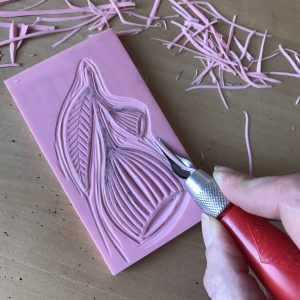
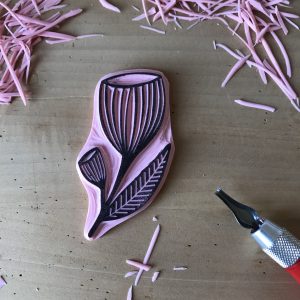
Carving:
If you chose a small design on a big block cut out roughly around the design with a knife. So you can easier turn your block what makes carving easier.
Let the fun part begin!! Start with carving the outlines of your design. I like to use a V-shape tool for the outlines. Finished the outlines..then it’s time for the details in the design. Slowly carve, not too deep all details away. When you are happy with the lines you can decide to make them a little deeper or wider.
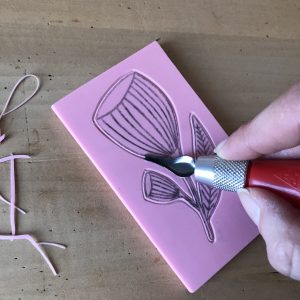

 Carving details
When you’re ready with carving the design, it’s time for the edges around the design. You have two options. See pictures.
Option 1: carve away the edges roughly, don’t carve away everything this gives your stamp a more dynamic look.
Option 2: carve away all edges around the design.
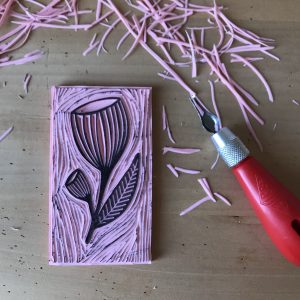
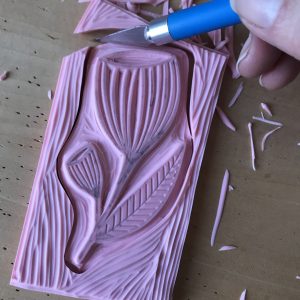 Cutting away the edges
First try:
It’s hard to see if the stamp is finished without ink on it. So it’s time to allow yourself to ink it when you think your done or when you have your doubts about certain lines.
Apply some ink, stamp it and carve away the parts that you don’t want to be there.
Yesss, you just made a stamp. To make it more fancy you can glue the stamp on a wooden (plywood) plate or on a acrylic block.
 Time to stamp!!
Time to play around:
For a beautiful print, be sure there is enough ink on the whole surface of the stamp.
Press firmly enough. You can use you body weight. Press with the palm of your hand, finger tips or use a wooden block/ baren.
Don’t lift the stamp immediately but allow the ink to absorb in the paper. After removing let the ink dry for a minute before touching it.
Have fun stamping!!!
PS: If you like my work and this tutorial and you want to support me, you are welcome to treat me on a cup of tea. Click here for the link. Thanks so much <3
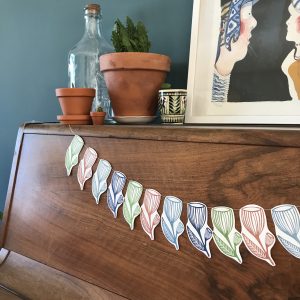
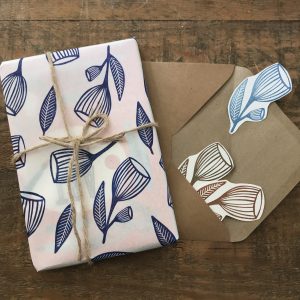 Ideas
Ideas